Eugen Sandow Kettlebell Workout (pic)

Ever heard of a guy named Eugen Sandow?

He was born in 1867. He had 18-inch biceps, and rock hard “8-pack” abs. And he was way ahead of his time with his training methods.

GUESS what one of the pieces of equipment he trained with was?

That’s right – kettlebells!

For example, he called this lift the “Swing Ring-and-Bell Lift From the Ground Over Head”:

“This is an effective as well as graceful exercise, calling into play the chief muscles of the trunk and limbs, and imparting litheness and elasticity to the movements.

The bell is placed on the floor a little in front of the feet, ring to the right, heels in line, and about ten inches apart. Bending the body on the hips, now stoop and grasp the ring by the right hand, knuckles to the right, then pull the ball up sufficiently to clear the floor and swing it inwards between the legs, then, as it swings outwards again, bear it aloft, taking a step forwards at the same time with the right foot to give purchase to the movement and balance the body.

As the ball gains the elevation of the head in the ring-grasped hand of the outstretched arm, tilt it to the back of the hand, by an adroit turn of the wrist, at the same time thrusting the arm fully out, as in the act of lunging upwards, the body being thrown forwards to assist, by its weight, in pressing the ball up, and especially to ease or break the force of the contact of the ball on the forearm, as it is tilted to the back of the hand in the upward ascent. Repeat the movement, which will be found an exhilarating exercise, observing the caution not to injure or break the forearm by permitting the ball to come rudely into contact with it as it is swung aloft.”

*text above comes from G. Mercer Adam’s (editor) book Sandow’s System of Physical Training, London, 1894

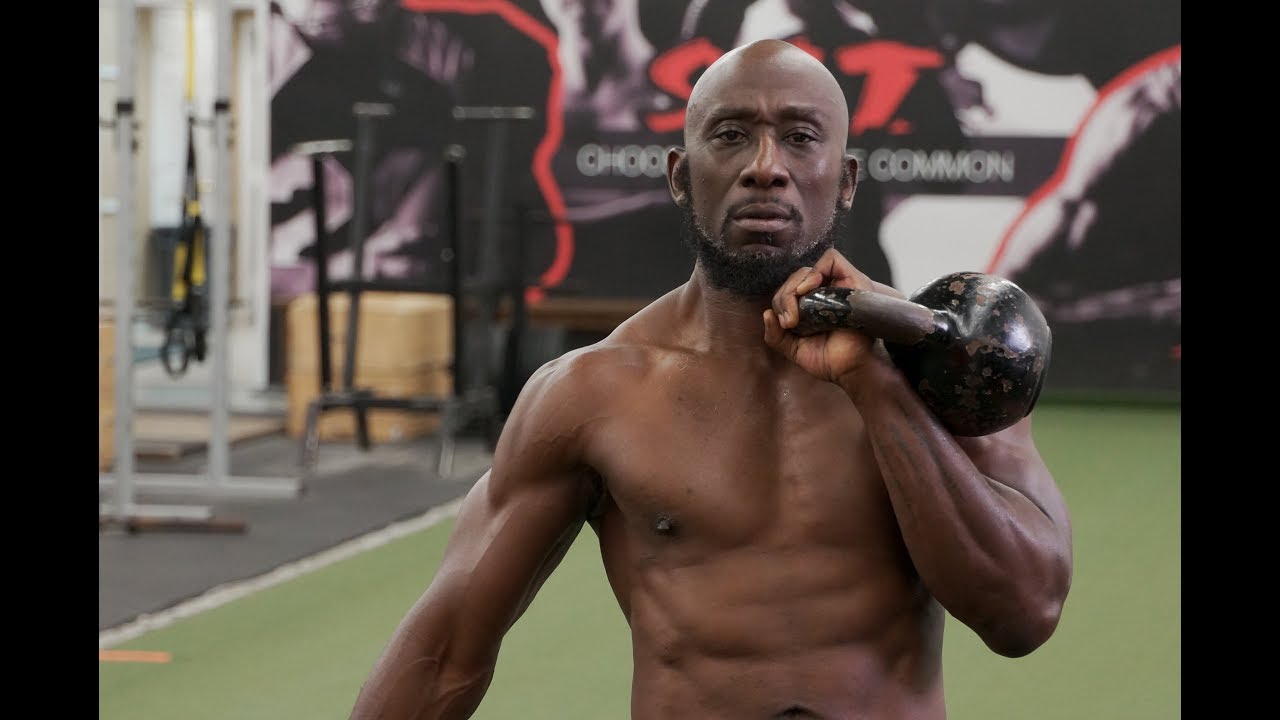
If you want to get a “classic physique” like Sandow, you are on the right track if you are training with kettlebells. They will help you build that lean, sinewy, functional muscle.

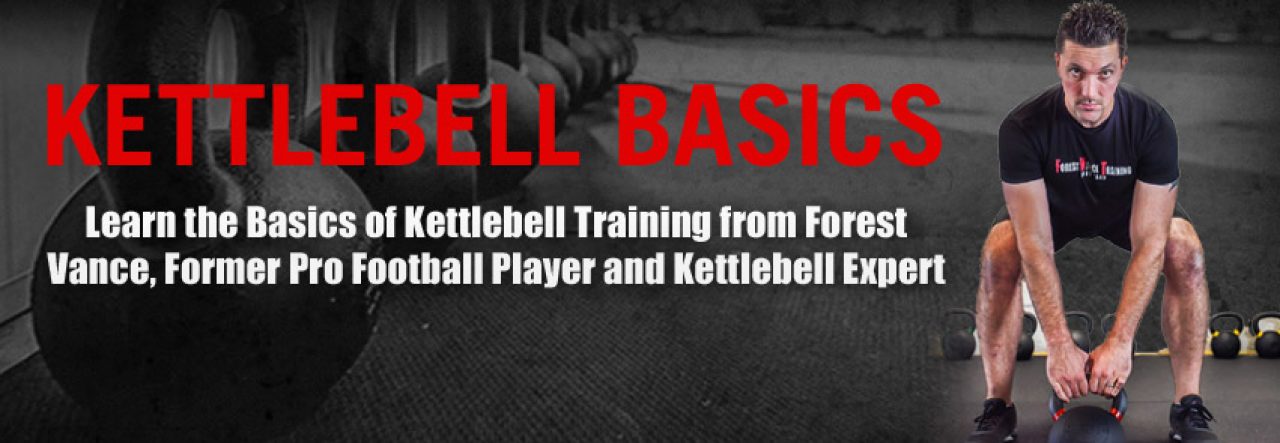
The other key to your success is having a well-designed training plan to follow. For one SPECIFICALLY designed to help you get results like the old-time strongmen, check out:

Classic Body Now

To your success!

– Forest Vance
ForestVance.com

(video) #1 Cause of KB Low Back Pain – and How to Fix It

Kettlebell swings are an awesome movement for building power, conditioning, and blasting fat – all at the same time.

BUT, the technique can be tricky.

Specifically, many folks complain of low back fatigue, or even pain, when learning how to do the movement.

Now there can be various reasons why this happens. A actual pre-existing injury could be one of them – so to be clear, I am NOT giving medical advice. Get checked and cleared by your doc before starting any exercise program.

But, if you are healthy, and you are doing the exercise correctly, you should NOT be experiencing lower back pain when doing swings, or even really feeling it much, if at all, in your lower back.

So what’s the #1 cause of KB low back pain?

From my experience teaching thousands of folks how to use kettlebells, it is swinging the kettlebell too close to the ground.

To fix it, just bring the ‘bell as close to the body as you can as it swings back.

The motion is similar to hike passing a football.

Another great cue is to imagine you are throwing the KB through your stomach … and then to get the hips out of the way at the last minute.

Check out this video to see the mistake, and simple fix, in action:

And if you found this tip helpful, be sure to check the new and improved version of my new “KB Hacks” home-study course: http://bit.ly/13kettlebellmistakes

To your success!

– Forest Vance, ForestVance.com

new “KB Hacks” videos – learn/refine your KB technique

Hello!

We have the new-and-improved-for-2019 version of my “Top KB Training Mistakes – and How to Fix Them” video home-study course now available … wanted to post here and make sure you knew about it:

http://bit.ly/13kettlebellmistakes

There are a total of 39 videos in this course that will help you learn – and for many, REFINE – the basics of safe and effective kettlebell training.

See, a lot of people *think* they know the basics … but 99.9% of folks, when they end up coming to my gym or one of my workshops or working with me some other way in person … could improve.

There might be just one little thing you are doing, that I cover in this course, that could make ALL the difference, and take your KB training to the next level.

Details and get the course at the link below:

http://bit.ly/13kettlebellmistakes

To your success!

– Forest Vance, MS
Certified Kettlebell Instructor
ForestVance.com

(new video) Most Common KB Clean Mistake – and How to Fix It

Kettlebell cleans are an essential move – but the technique can be tricky!

One of, if not THE most common mistake(s) people make with the move, is swinging the KB too far out in front of the body.

This ends up resulting in lots of impact as the KB comes around the wrist and lands at the top.

One simple (but powerful) tip to improve is simply – keep the arc of the KB close to your body.

Imagine like there is a wall a foot or so front of you as you clean, and keep the KB from hitting it.

Watch the video for the full demo:

And if you find this tip helpful, stay tuned!

The new and improved version of my best-selling “Most Dangerous KB Training Mistakes – and How to Fix Them” home study course will be available VERY soon.

Keep an eye on your email inbox 🙂

– Forest

(guest article) 4 Tips for Pain Free Kettlebell Work

Today’s article is an excerpt from Chandler Marchman’s MetCon-6 training manual.

I thought these tips were super useful, so wanted to pass along.

– Forest

#

4 Tips for Pain Free Kettlebell Work
excerpt from – MetCon-6

One of the big reasons that so many lifters shy away from kettlebell training is that they have had a painful experience with them. This pain most commonly is experienced on top of the forearm (just above the wrist) because of either the kettlebell resting improperly on top of the forearm during movements where the kettlebell remains fixed exercise, or because during the more ballistic movements the kettlebell crashes down on said spot. There are a few simple steps you can take that will help you fix this issue though.

1. Grip handle in the palm of your hand (NOT in your fingertips) with your wrist in a neutral position.

By griping the kettlebell in this “wrist cocked” manner, not only will you eliminate any hyperextension (bending back) in your wrist that might cause joint pain, but you will also eliminate any power leaks that occur when you’re unable to transfer optimal amounts of force into the kettlebell that you’re trying to apply force into.

2. DON’T “gorilla grip” the bell during ballistic movements.

Normally, you want to grip the handle of the kettlebell as tightly as possible while keeping your wrist in the cocked position. But when you perform either a clean or snatch, the handle of the kettlebell must be able to rotate inside your hand so that you can use the “pull & punch” maneuver to prevent it from crashing on top of your forearm. This is impossible to do with a gorilla grip on the bell.

So, keep the handle in the palm of your hands with a handshake strength grip so that you maintain control of it, but also allow it to rotate freely inside your hand when you need to “catch” the kettlebell during either the clean or snatch.

3. “Tame the Arc”

By retracting and depressing your shoulder blades during both the clean and the snatch (the only movements that require you to transition from the kettlebell in the normal grip position to lying on top of the forearm), you will be able to shorten the path that the kettlebell travels in, and create a more stable and controlled environment for the kettlebell to travel in.

4. Move the kettlebell around your wrist, not your wrist around the kettlebell.

This is the “pull & punch” move that I told you about earlier that during the clean and snatch allows you to avoid the kettlebell crashing down on your arm. What you’ll want to do is while “taming the arc” via retraction and depression of your shoulder blades (thus shortening the loopy trajectory of the bell path AND increasing your control of the kettlebell in space), propel the weight up by driving your hips forward, and while this propels the weight forward and up, pull your elbow back and punch your wrist through to “catch” the bell softly against your arm.

#

If you found these tips helpful, be sure to also check out the full Met-Con 6 program at the link below:

MetCon-6

10 Minute Single Kettlebell Workout

More and more research has shown that you can introduce more than enough stress to your skeletomuscular system, respiratory system, and central nervous system to obtain the training adaptations you’re looking for in as little as 10 minutes time.

How you ask?

By focusing more so on the quality of both the exercise you choose, and the execution of it.

The truth is, “Training Economy” is the aspect of most lifters training routine that is holding them back.

They’re choosing “low return on investment” exercises that simply don’t achieve enough of what we’re looking to achieve in the time span that we have to achieve it.

Enter – the kettlebell.

Essentially, every kettlebell exercise you do is a power packed movement that right off the bat places more of the overall stress on your body that is requires to obtain the ideal results in both the performance and aesthetics department that you’re looking for.

And when you combine the fact that each kettlebell exercise offers you the unique ability to get more done with every exercise you do, with the fact that you will perform these kettlebell workouts in a circuit format, you’ve got the perfect recipe for workouts that allow you to accomplish EVERYTHING (speed, strength, explosiveness, size, & fat-loss) in a matter of minutes instead of hours.

Try the workout below as an example:

#

10 Minute Single Kettlebell Workout
Sample Workout – Met-Con 6

5 Rounds:

(a) Single Arm Snatch (5 reps/arm)
(b) Anti-Lateral Flexion Overhead Press (5 reps/arm)
(c) Anti-Rotation Row (5 reps/arm)
(d) Single Arm Farmers Walk (100 ft./arm)

» Rest 2 minutes between rounds «

*Perform ALL exercises of the circuit on one arm before switching arms. Do not rest until you have completed all reps on each side.*

#

Just 10 minutes, and you’ve burned a lot of body fat, in just a little bit of time.

Give that one a go, and let us know how you do!

And if you like it, also be sure to check out the full Met-Con 6 program at the link below:

Met-Con 6

To your success! –

– Forest Vance
ForestVance.com

Lactic Acid Interval Training – Sample Workout

Are you looking to lose fat?

Do you like intense workouts?

If you answered yes to BOTH of these questions, you will love Lactic Acid Interval Training! (link)

You see, Lactic Acid Interval Training is awesome for fat loss. But it’s also pretty intense, and can be quite painful.

It involves a large caloric expenditure due to shortened rest periods and high work volume. You get a great EPOC (post exercise oxygen oxygen consumption) effect, for increased calorie burn all day. And research even supports the fact that this type of training leads to increased Growth Hormone levels, which increases the use of fat for energy during recovery after intense exercise.

Okay – ready to give this a try yet?!? 🙂

#

Lactic Acid Interval Training
sample workout from the Funk Roberts HIIT Bundle

The method is quite different from what you’re used to. There is NO number of sets, only target reps. In other words, there is no limit to the number of sets as long as you reach the target reps for each workout.

You need to pick a weight that will allow you to perform 8-9 reps with good form for the range on the first set.

(If you can still reach the target range on the second set, then you need to choose a heavier weight.)

Think about SPEED with this training approach. Perform the concentric part of as fast as you can (with perfect form).

Once you feel that your speed is slowing, you stop. That was your first set. Rest a maximum of 30 sec and resume till your speed slows down then stop. That was your second set. And you keep doing that till you reach the target number of reps.

Let’s try a sample workout – perform 2 rounds of the following:

30 KB goblet squats
(do about 30 seconds of jumping jacks for active recovery, then -)
30 inverted rows
(do about 30 seconds of high knees for active recovery, then -)
30 push ups
(do about 30 seconds of jumping jacks for active recovery, then -)
30 KB figure 8 to hold (15 reps per side)

#

Get the full Lactic Acid Interval Training program, along with 19 more full programs like it, at the link below:

19 Metabolic / HIIT / Metcon Workout Programs

This is called the “Metabolic Madness” bundle.

There are 19 total workout plans:

– Lactic Acid Interval Training
– HIIT Workouts
– Filthy 50’s
– Dirty 30’s
– Complex Workouts
– EMOM Workouts
– Mega Metabolic Madness
– Bodybuilding HIIT 2.0
– Metabolic Exhaustion Workouts
– FunkWOD
– Metabolic Chaos
– Bodyweight 500
– 1000 Rep Workouts
– Fight Gone Bad Circuits
– German Volume SuperSets
– Metcon Madness
– Bodyweight Metabolic Circuits
– Upper-Lower Body Metabolic Workouts
– Tabata Super 6

All of the plans are created by Funk Roberts. Funk is a former professional athlete turned Master Metabolic Trainer who is the creator of the Metabolic Conditioning Coach Certification through NESTA, and has used this training system to help thousands of people around the world transform their body and fitness.

You can use these plans yourself (obviously) for your main workouts, to add-on to your current routine, as “off-day” cardio sessions, etc.

If you are a trainer or coach, you will also get SO many great ideas that you can use with your clients to keep them happy and excited to be coming back for more and telling all their friends.

But get them now at the link below, because this is only up for a limited time:

19 Metabolic / HIIT / Metcon Workout Programs

To your success!

– Forest Vance, MS
Certified Personal Trainer
ForestVance.com

15 Min Swing / Push Up / Burpee EMOM Workout

In a traditional weight lifting set up, you would perform one exercise for a designated number of reps, doing a certain number of sets per exercise.

Your rest periods may often be dictated based on your goals.

They could be anywhere from 30 seconds – if you are going for more endurance / fat loss – to up to three minutes if you are really trying to aim for maximum strength and muscle development.

With the Every Minute On the Minute (EMOM) approach, rest periods will be determined by how quickly you are able to progress through the exercises you are supposed to be performing.

In an EMOM workout, you’ll typically have a list of exercises to go through. The number of exercises will depend entirely on the workout in question.

(In some cases, you may have just two exercises to perform, back to back, alternating between them. In other cases, it may be an entire circuit that you are attempting to get through.)

You’ll have a target number of reps to perform with every exercise, and once those reps are completed, the remainder of that minute is your rest period.

Once the next minute buzzer sounds, it’s off to do the exercise again.

This way, you are doing the exercises Every Minute On the Minute, as the name suggests 🙂

Here’s an example:

#

15 Min Swing / Push Up / Burpee EMOM Workout

Perform the exercises for reps starting on Every Minute On the Minute for 15 minutes straight:

– 20 two hand KB swings
– 15 push ups
– 10 burpees

#

That workout seems simple, but it’s quite tough!

You’ll end up doing 100 swings, 75 push ups, and 50 burpees, all in just 15 minutes.

The first round might not be too tough, but as the workout progresses and fatigue kicks in, you’ll see that it gets much harder, fast 🙂

This is one of the things that makes EMOM unique.

Also, with this style of training, you’ll end up getting improved cardio conditioning, enhanced muscle and strength endurance and superior fat burning results.

Use the resources at the link below to learn how to start encorporating it into your program today:

19 Metabolic / HIIT / Metcon Workout Programs

If you are not getting the results you want from your current workouts, this could be just the varitey and newness and inspiration you need to get things kick started again.

To your success! –

– Forest Vance, MS
Certified Personal Trainer
ForestVance.com

PS – Find out at the link below why everyone is raving over this offer:

19 Metabolic / HIIT / Metcon Workout Programs

This is called the “Metabolic Madness” bundle.

There are 19 total workout plans:

– Complex Workouts
– EMOM Workouts
– HIIT Workouts
– Mega Metabolic Madness
– Bodybuilding HIIT 2.0
– Metabolic Exhaustion Workouts
– Lactic Acid Interval Training
– FunkWOD
– Filthy 50’s
– Dirty 30’s
– Metabolic Chaos
– Bodyweight 500
– 1000 Rep Workouts
– Fight Gone Bad Circuits
– German Volume SuperSets
– Metcon Madness
– Bodyweight Metabolic Circuits
– Upper-Lower Body Metabolic Workouts
– Tabata Super 6

All of the plans are created by Funk Roberts. Funk is a former professional athlete turned Master Metabolic Trainer who is the creator of the Metabolic Conditioning Coach Certification through NESTA, and has used this training system to help thousands of people around the world transform their body and fitness.

You can use these plans yourself (obviously) for your main workouts, to add-on to your current routine, as “off-day” cardio sessions, etc.

If you are a trainer or coach, you will also get SO many great ideas that you can use with your clients to keep them happy and excited to be coming back for more and telling all their friends.

But get them now at the link below, because this is only up for a limited time:

19 Metabolic / HIIT / Metcon Workout Programs

(new video) 5 Minute Kettlebell Swing Workout

This short kettlebell workout seems simple – and it is! – but it’s also quite the challenge.

You’ll get around 100 total swings in, a nice cardio spike, and a great chance to work on your kettlebell form.

This is PERFECT to use at the end of your existing workout to finish strong.

Or, if you’re pressed for time, you can even use it as a stand-alone “mini” conditioning session.

#

5 Minute Kettlebell Swing Workout

YOUR CHOICE:

– two hand swings
– one hand swings

Set the timer for 5 minutes.

First 30 seconds, you’ll do two hand OR one hand swings.

Second thirty seconds, you’ll do some “active recovery” (run in place or jumping jacks).

Repeat for 5 minutes total.

#

FREE BEGINNER’S GUIDE TO KB TRAINING

In my Beginner’s Guide to Kettlebell Training, you’ll learn the basics of the safe and effective KB training. You’ll also get a sample workout to hone your skills.

Get it free for a limited time at the link below:

http://forestvance.com/beginnerskbguide

KB Strong – Strength Testing Protocol (standards inside)

Here is the strength testing protocol for the KB Strong Challenge.

Please complete this by Monday, March 4th, so that you can set goals for our 6 weeks working together.

FORM FIRST! If you are unsure about any of the movements, take it slow and don’t over-do it. We will be working on form and maximizing results for the full 42 days.

You can also do the testing before or after your 1st workout of the program.

*Haven’t applied for the Challenge yet? There’s still time, but hurry – we kick off Monday, March 4th!

http://bit.ly/kbstrong2019

#

KB Strong – Strength Testing Protocol

1 — KB swings

Clock will be set for 30 second intervals. On each interval, 10 swings will be performed. Rest period is the time between the 10 swings are finished and when the next 30 second interval starts. Repeat for a total of 10 rounds.

SCORE = total reps completed x weight lifted

(ex – 100 reps with 24k / 53 pound KB = 5300)

2 — Push ups – knees for women, toes for men

Elbows and upper arm BREAK parallel, no exceptions … body stays in a totally straight line, no hip sag or “A frame” … no adjusting the knees, hands or feet during the test.

SCORE = total reps completed in one non-stop set with perfect form.

3 — Pull ups

OPTION 1 – FULL PULL UPS

Overhand grip will be used. Start from a full hang position with the body. Touch the neck or check cleanly to the bar at the top of each rep. Lower completely to a fully extended arm position at the bottom of each rep.

SCORE = total reps completed in one non-stop set with perfect form.

OPTION 2 – FLEXED ARM HANG

Start with the hands facing the body (chin up grip), chin over the bar. (Use assistance to get there if needed.) Hold as long as possible.

SCORE = seconds held with chin over the bar

4 — Burpees

Thighs and torso much touch the ground at the bottom of the movement. Full extension of the body – knees, hips, and upper body – as well as a jump and clap of the hands over head – must be completed at the top of each rep.

SCORE = total reps completed in 60 seconds

5 – Single arm KB press

The kettlebell must be cleaned to the shoulder with one hand in smooth motion. The kettlebell must come to a complete stop at the shoulder. The hand of the pressing kettlebell must start under the chin. There will be no bending of the knees or leaning to the side as the kettlebell is pressed overhead. The kettlebell must come to a complete and controlled stop at the top of the movement. The kettlebell must be lowered to the ground in a controlled fashion.

SCORE = maximum weight lifted for a single rep on BOTH SIDES

#

Haven’t applied for the Challenge yet? There’s still time, but hurry – we kick off Monday, March 4th!

http://bit.ly/kbstrong2019

Look fowrard to working together on this –

– Forest Vance, MS
Certified Kettlebell Instructor
ForestVance.com